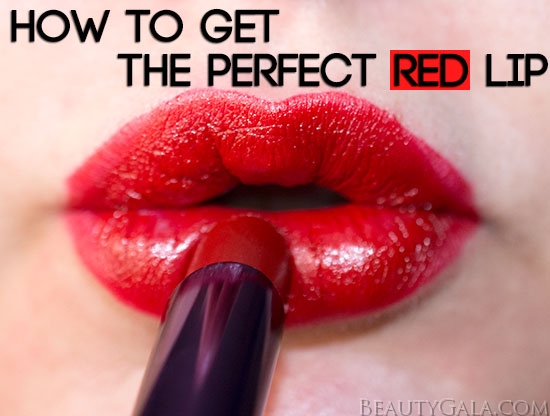
When I asked last week what types of tutorials or looks you would like to see on Beauty Gala, I had a request for a tutorial on how to achieve the perfect red lip. Believe it or not, there is actually a method behind really bright lips, especially if you want them to look perfect. I often get questions on my Instagram about how I get my lipstick to look perfect or how I make sure my red lipstick doesn’t feather or “bleed” from my lip line. The truth is, red lipstick is a little high maintenance, only because there is a little preparation when wearing it. It’s not always as simple as slap it on and go like many other neutral and pink shades. I’ve got a full step-by-step tutorial and a pictorial inside of how I achieve the perfect red lip. And, psst…this lip tutorial really works for any bright, dark, or dramatic colors you may own and want to wear, you just have to change up your lip liner and lipstick shades!
[Some products may be press samples.]

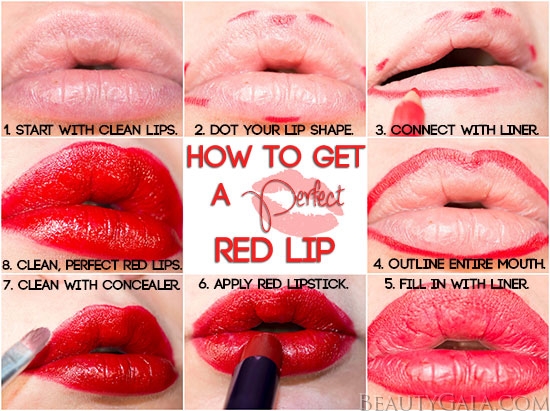
STEP ONE: Start with fresh, clean, moisturized lips. If you’re in a hurry and your lips are dry and chapped, red lips just might not be a good idea for you that day. If your lips are dry and chapped and you have a few extra minutes, go ahead and use a warm, damp washcloth to gently scrub your lips and the dead skin away. Apply a tiny bit of lip balm so that your lips can soak up the moisture ahead of time. Luckily, my lips were in good shape today and I didn’t need to do any extra prep work before beginning. Also remember that the finish of your lipstick will either help or hurt the moisture content of your lips. Red lipstick that is matte is going to dry out your lips, so you’ll need extra moisture. A satin or glossy finish in your red lipstick will add moisture.
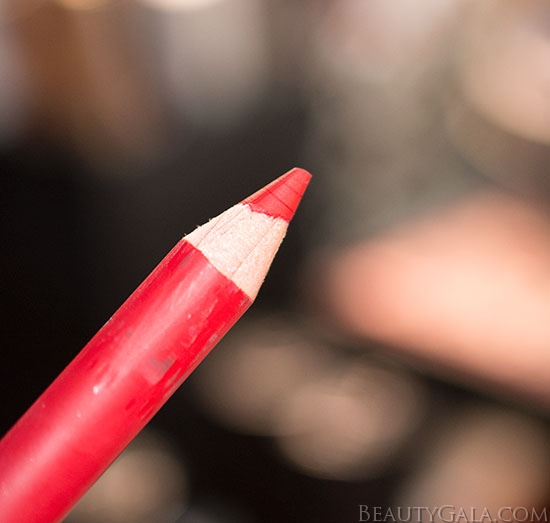
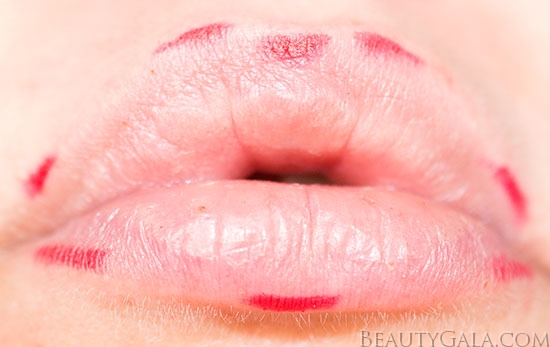
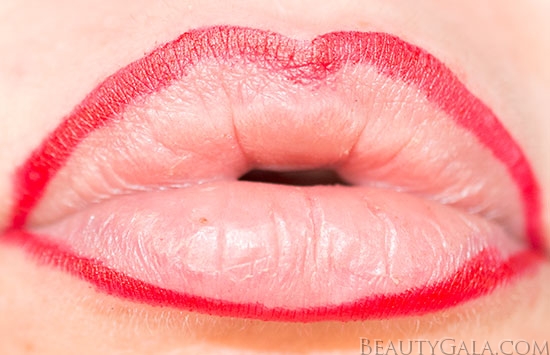
STEP TWO: Grab a red lip liner and make dots on your lips that correspond with your lip shape. This is an important step because everyone has a very different lip shape. Some of us have fuller lips, smaller lips, uneven Cupid’s Bows, etc. It’s important to get acquainted with your lip shape personally so that you can line your lips and apply lipstick quickly after a little practice. I use a Milani Lip Liner (02 – True Red), and I love it because it’s drugstore available and a great price. With the exception of some MAC Lip Liner’s, I really don’t believe in spending a lot of money on lip liners. I find that they all do the same job, so there’s no point in wasting your money on expensive ones. Apply dots along the Cupid’s Bow (that’s the middle of your upper lip) so that you can connect the dots once you line your lips. The dots help place an image of symmetry in your brain, and a lot of people are intimidated by red lipstick because of their Cupid’s Bow. Some Cupid’s Bows are much more defined, angular, or flat, so there is no right or wrong shape, it is just the way you were born. It’s best to go with what nature gave you and fill in along that area.
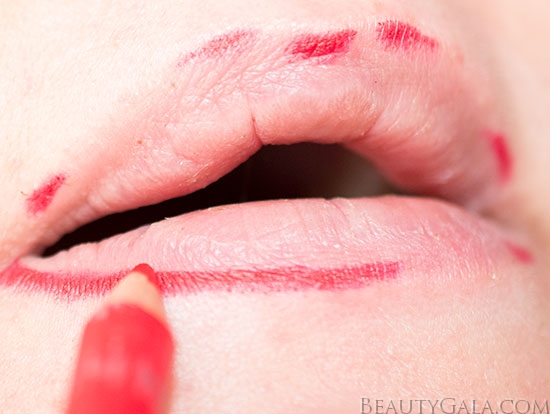
STEP THREE: Connect the dots you made with your lip liner. I found lip liner to be very intimidating when I first used it, so by creating the dots around your lip shape, you’re making it much easier to line your lips. Use long strokes with light pressure. Don’t worry about it being perfect, just line the general shape of your lips.
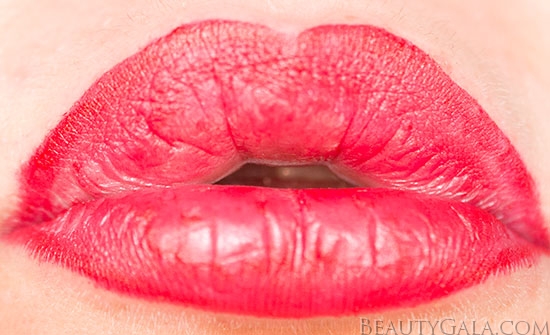
STEP FOUR: Fill in your lips with your lip liner. Most lip liner’s have a matte finish to them, so don’t be alarmed if the finish looks flat or your lips look a bit dry here. Filling in your lips with lip liner is really just a trick to make your lip color last longer.
STEP FIVE: Apply your lipstick within the borders of your lip liner. I am using Urban Decay’s “Mrs. Mia Wallace” which is one of my favorite red shades. The finish is satin and is very hydrating to my lips. I like to apply it to my bottom lip first and then press my lips together so any excess on my bottom lip goes to my upper lip. Then, I apply the lipstick to my upper lip, being sure to stay within the lip liner and not over-apply product. At this point, I typically will blot my lipstick once on a tissue and complete this step all over again. This is, again, a great trick for creating really long-lasting staying power.
You can see that while I have my lips lined and my lipstick is applied here, it’s still not perfect and there’s some lipstick that is bleeding outside of my lip line. That’s okay, because this next step is really the most important in the tutorial and one that many, many makeup artists use.
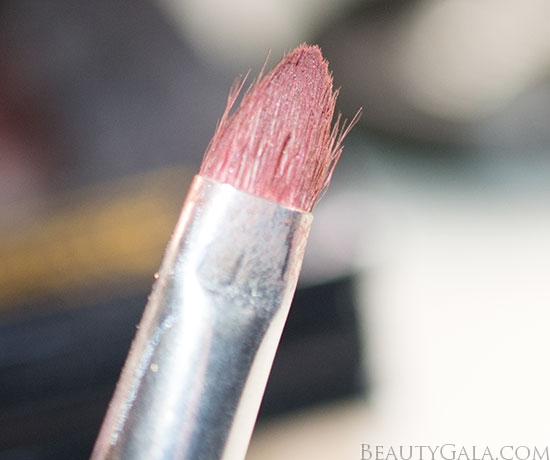
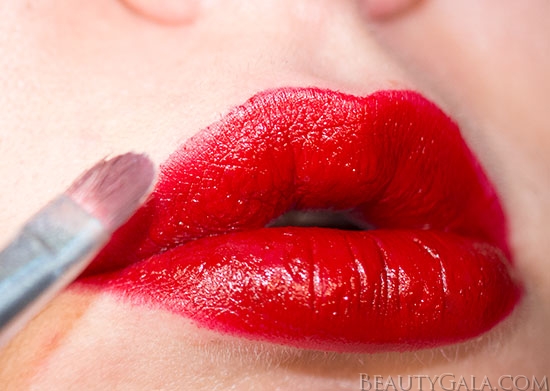
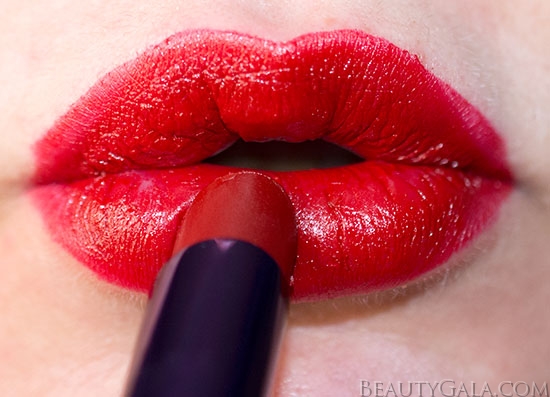
STEP SIX: Using a small, flat brush, apply concealer (or makeup remover, either works) to your brush. Go back and clean up the edges of your lip lines. You can create really crisp, precise lines with no feathering, so try your best to use a steady hand when cleaning up your lips. This step makes ALL the difference in the world between looking like a beauty disaster and having the sexiest lips ever.
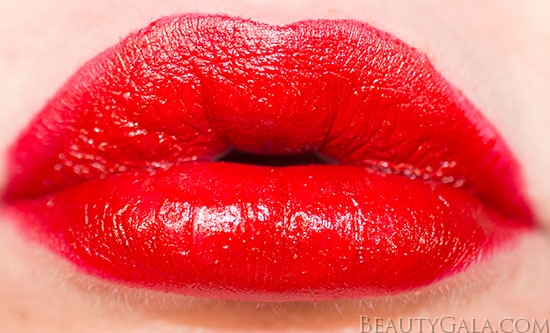
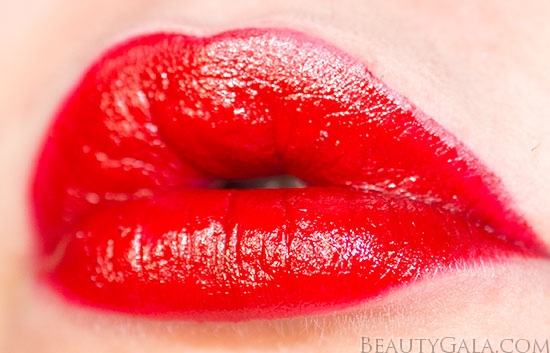
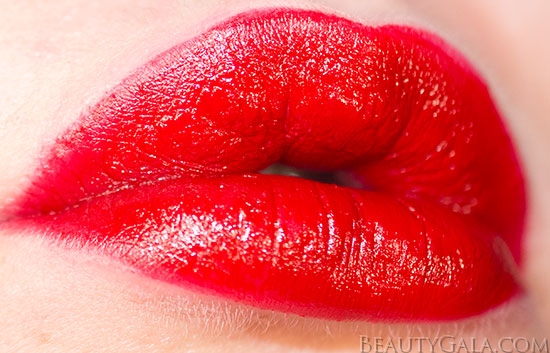
THE FINISHED PRODUCT:
More often than not, it’s not the actual lipstick that causes feathering and bleeding. When you clean up those edges with concealer or makeup remover, you get really crisp lines that make the product look great. Depending on your lip shape, you may notice yourself cleaning up specific area’s of your lips. For me, it’s always the sides of my upper lip and the middle area of my lower lip that feathers and needs to be cleaned up. Once you practice this method and get to know your lip shape really well, this entire tutorial will take you less than 5 minutes, tops. Practice really does make perfect and it definitely pays off to get to know your lip shape well.
If you need a quick guide to save on your phone or computer, you can easily save the above pictorial! Everything in this tutorial is mapped out for you in one image and you can follow along in front of a mirror with your own lip liner, lipstick, and lips. As I said, this tutorial works interchangeably with any bright or bold lip color, whether it’s a hot pink shade or a dark, vampy wine shade. Just switch up the liner and lipstick shade and apply the same principles!
The main complaint about red lipstick is that it can look “Grandma-ish” or very matronly. It can make you look really sophisticated and sexy or it can age you. When you really spend the extra time to prepare your lips, line them, and clean up the edges, you’ll be left with nothing but glamorous, kissable red lips!
If you have any questions about applying red lipstick, feel free to leave them below! As a general rule of thumb, when applying makeup to other faces, I usually always follow this procedure for lipstick, even if it is a nude, pink, or neutral shade. It’s foolproof every time!
[ALL PHOTOGRAPHY ON THIS SITE IS TAKEN BY REBECCA KAZIMIR. NO PHOTOGRAPHS ARE TO BE REPRODUCED WITHOUT WRITTEN PERMISSION.]
Leave a Reply