[Press samples.]
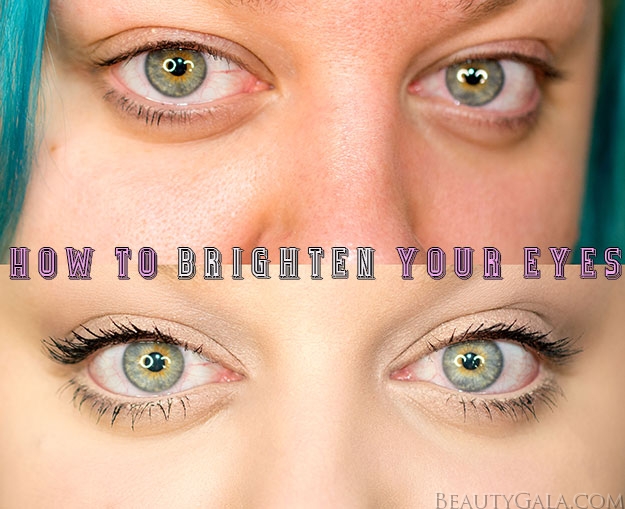
As a makeup artist, one of my most requested looks is a bright eye area. Many complain that they have dark circles, puffy eyes, and uneven skin tone around their eye area. The good news is that it is easily correctable and with enough practice, you can have this routine down in under 5 minutes. Bright eyes can give you a doll-like appearance and help you look refreshed, awake, youthful, and healthy. Follow along with me as I show you how to do it!
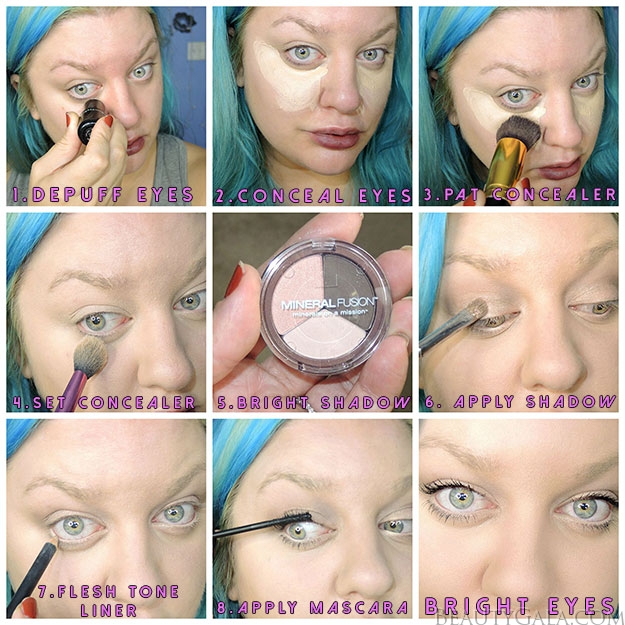
1. Depuff Eyes. It’s completely normal to wake up with puffy eyes since the fluid in our body tends to gather there while we are sleeping. Using an eye cream, eyelid primer, cooling gel or stick, or any product that works for your skin type is key. I used TONYMOLY Panda’s Dream Brightening Eye Base (and yes, it really comes in adorable panda packaging). This product is a cult-favorite from Korea, where perfect, bright skin is their #1 priority. I rub it underneath my eyes and pat it in.
2. Conceal Eyes.You can use any concealer here that you like and is in your budget, but you want to use a shade that is 1-2 shades lighter than your actual skin tone. Apply it in a triangle shape like you see in the pictorial above so you get a lifted appearance from your temples to your nose. I used Maybelline’s Better Skin Concealer, which is available at the drugstore and is one of my favorite products at the moment.
3. Pat Concealer. You do not want to rub the product into your under-eye area and blend it. Instead, make sure you’re using a patting motion with either a brush or your fingers. Patting the product in ensures that you’re not just swiping the product up and away off of your skin.
4. Set Concealer. I always set the concealer underneath a client’s eyes with a brightening powder. I used the Kat Von D Shade + Light Palette for this. The top row of powders is meant for highlighting and brightening without any shimmer.
5. Bright Shadow. You want to use a brightening eyeshadow for this look. Anything that you already have in your collection will work as long as it is shimmery and reflects light well. I used Mineral Fusion’s Rose Gold Eyeshadow Trio. It will work on a variety of skin tones and is all natural. I used the shimmering, bright rose gold shade in the trio.
6. Apply Shadow. This is where you want to generously apply that brightening shade to your eyelid. You can take it up into the crease and even apply it along the brow-bone and along the lower lash-line. Be sure to also apply it into the inner corners of your eyes for that pop of shimmer.
7. Flesh Tone Liner. To tie everything together, I always use a flesh-toned eyeliner along my lower water-line. My favorite is MAC Chromagraphic Pencil in NC15/NW20. It also comes in two other shades made for medium and dark skin tones, as well. This will give you that super round-eyed, awake appearance.
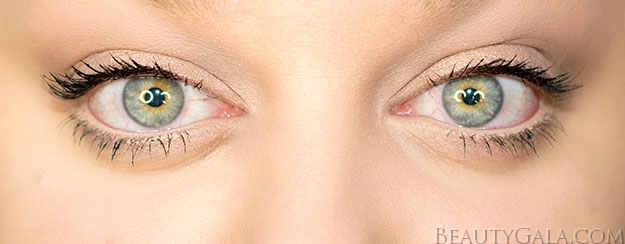
8. Apply Mascara. Using your favorite mascara, apply it to your upper and lower lashes generously. I used Max Factor Masterpiece Transform Mascara which is my all-time holy grail mascara and is not available in the United States. I purchase mine online from eBay and I will never switch from this mascara because I have yet to find anything that transforms my eyelashes like this one does.
BRIGHT EYES!
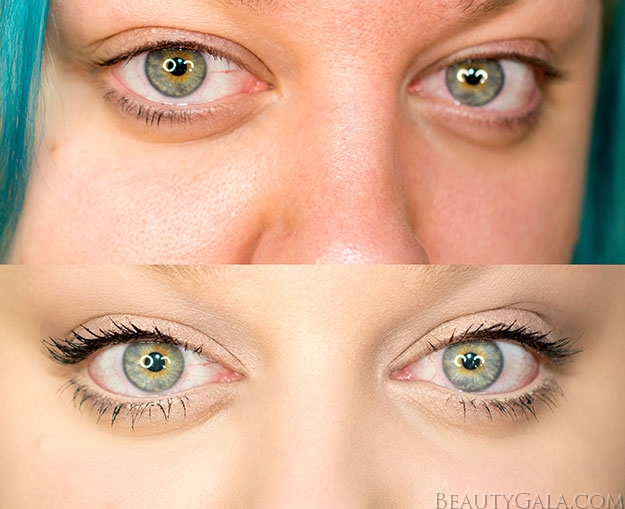
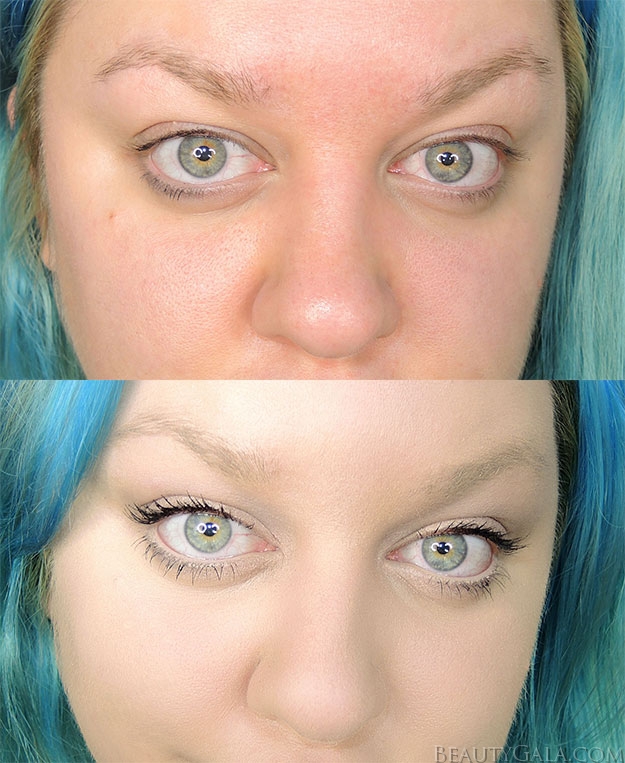
Before and After
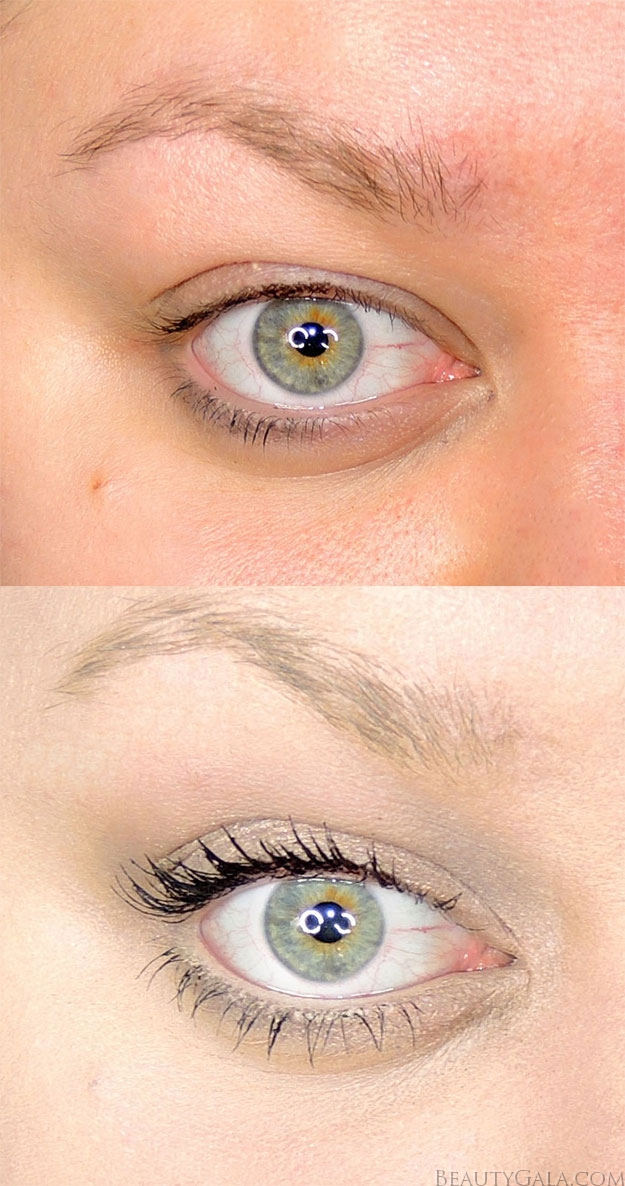
Before and After
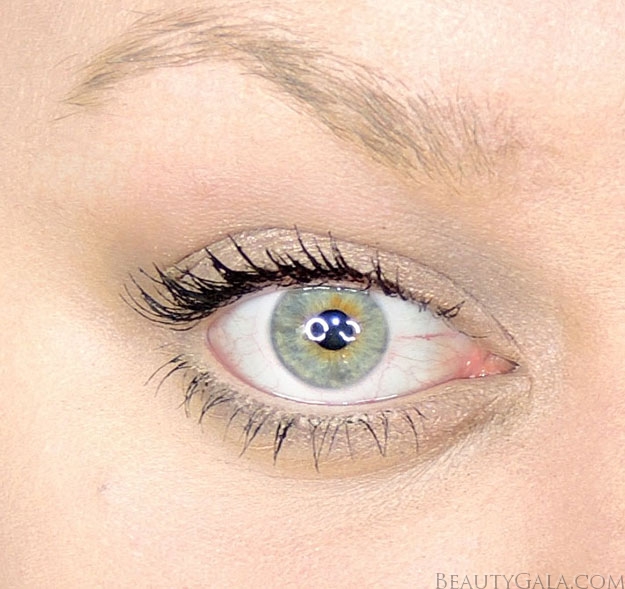
Before and After
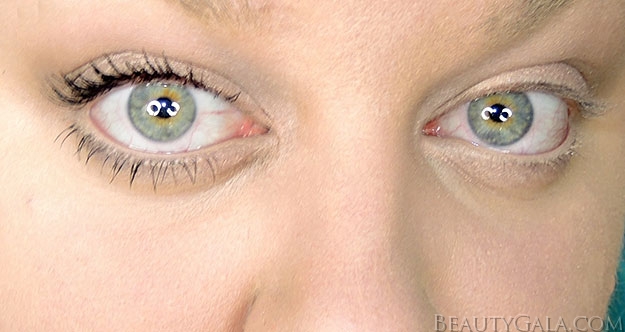
Max Factor Masterpiece Transform Mascara, with one eye done and the other eye not done.
You can see what a huge difference your favorite mascara makes. Everyone loves a different mascara because we all have different eyelashes and our lashes respond differently to certain formula’s.
Knowing how to make your eye area brighter and more youthful looking is one of the foundational keys to great but simple makeup. If you’re pressed for time often or you simply don’t like to fuss with makeup, this is a great way to liven up your entire face without putting in a lot of effort.
As always, if you have any questions about the process or the products used, feel free to leave them in a comment below!
[ALL PHOTOGRAPHY ON THIS SITE IS TAKEN BY REBECCA KAZIMIR. NO PHOTOGRAPHS ARE TO BE REPRODUCED WITHOUT WRITTEN PERMISSION.]
Leave a Reply